 dominic
Water tank repairs typically involve identifying the leak source, draining and cleaning the affected area, applying the appropriate patch or sealant, and verifying the repair holds under pressure. Most homeowners can tackle simple patch jobs on smaller domestic tanks within a few hours using basic tools, but structural damage, pressure vessel repairs, or tanks serving fire protection systems require certified professionals and compliance with NFPA standards.
Whether you’re dealing with a pinhole leak in your basement hot water tank at 2 a.m. or noticing rust stains spreading beneath your HVAC buffer tank, understanding when to grab your toolkit versus when to call for emergency service can save you thousands of dollars in water damage. The challenge is that water tanks come in many configurations: domestic hot water heaters, thermal storage systems, elevated fire protection tanks, and pressurized vessels. Each type has different repair requirements, safety considerations, and regulatory obligations.
The good news? Modern repair technology has advanced significantly. Professional services now use ultrasonic testing to pinpoint hidden leaks without invasive investigation, and instant-cure lining systems can restore tank integrity in hours rather than days. API 653 certified technicians can assess whether your tank needs a simple patch, a structural weld, or complete replacement based on wall thickness measurements and corrosion patterns you can’t evaluate with a flashlight and visual inspection alone.
This guide walks you through the complete repair process, from initial leak detection through final pressure testing. You’ll learn which repairs fall within DIY capability, what tools and materials you need, how to work safely around pressurized and elevated tanks, and when professional expertise becomes non-negotiable. We’ll also cover the repair-versus-replace decision that stumps most property owners, helping you understand true lifecycle costs rather than just immediate fix expenses.
Understanding Water Tank Types and Common Repair Needs
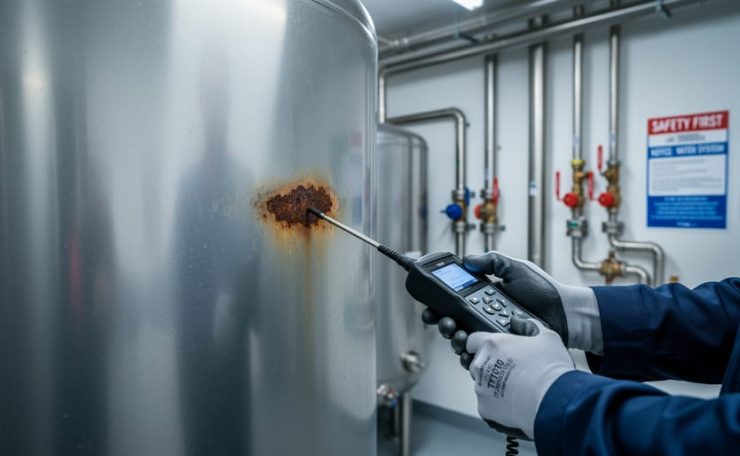
Water tanks come in three main configurations defined by NFPA 22 standards: elevated tanks mounted on towers or building structures, at-grade or below-grade suction tanks that feed fire protection systems, and pressure tanks that maintain constant water pressure. Each type serves different functions, from domestic hot water storage to HVAC buffer systems and fire suppression, and each presents unique repair challenges based on its position and operating pressure.
The material your tank is made from determines both its lifespan and the repair methods that will work. Steel tanks dominate commercial installations because they handle high pressures and temperatures well, but they’re vulnerable to corrosion at weld seams and anywhere the protective coating breaks down. Concrete tanks resist corrosion better but can develop structural cracks from freeze-thaw cycles or settling foundations. Wood tanks, still common in older fire protection systems, face rot and drying issues that compromise their structural integrity. Coated fabric tanks, the newest category recognized by NFPA 22, offer lightweight portability but can tear or delaminate at stress points.
No matter what type or material, certain problems appear across all water tank systems:
- Pinhole leaks and seepage from corrosion eating through tank walls or welds
- Visible rust stains, flaking metal, or white mineral deposits indicating active corrosion
- Structural cracks in concrete tanks or separation at seams in steel tanks
- Pressure loss or inconsistent water delivery pointing to internal damage
- Discolored or foul-smelling water from corroded linings or bacterial growth
- Higher energy bills on hot water systems due to sediment buildup reducing thermal efficiency
- Visible bulging, sagging, or deformation indicating structural failure risk
Domestic hot water tanks, HVAC buffer tanks, and thermal storage systems face an additional challenge: thermal efficiency loss. Sediment accumulates at the bottom of heated tanks, creating an insulating layer that forces your system to work harder and costs you more every month. That sediment also accelerates corrosion by trapping moisture against the tank floor, turning a maintenance issue into a structural repair need if ignored too long.
When to Call a Professional vs. DIY Repairs
Knowing when to tackle a tank repair yourself versus calling a licensed professional can save you money, time, and potentially prevent serious safety hazards. The line between DIY-appropriate and professional-only work depends on the tank type, the nature of the damage, and regulatory requirements.
You can reasonably attempt minor surface-level fixes on non-pressurized domestic hot water tanks: tightening loose fittings, replacing worn drain valves, or applying small epoxy patches to pinhole leaks in easily accessible areas. These tasks require basic tools and carry manageable risk if you shut off power and water first.
Professional expertise becomes non-negotiable for several scenarios. Fire protection water tanks fall under NFPA 25 standards for inspection, testing, and maintenance, requiring certified technicians who understand the regulatory framework and can document compliance. Structural welding on steel tanks demands specialized skills and API 653 certification for commercial installations. Gas-fired water heater repairs involve combustion safety and typically require a licensed plumber or gas fitter under local codes.
Pressure tanks and HVAC buffer tanks operate under internal pressure that creates serious injury risks if mishandled. Any repair involving the pressure vessel itself, not just external fittings, should go to a professional who can pressure-test the system properly afterward. Similarly, thermal storage systems integrated with HVAC equipment often have complex controls and multiple connection points where amateur repairs can cascade into expensive damage.
The age and condition of your tank matters too. If a twenty-year-old water heater develops its third leak in six months, a professional can assess whether repeated patching makes economic sense or if replacement is the smarter long-term investment. Licensed plumbers also carry insurance, warranties on their work, and knowledge of local permit requirements that protect you from liability.
Tools and Materials Needed for Water Tank Repairs
Professional water tank repairs demand the right equipment, showing up without proper tools wastes time and risks incomplete repairs. What you need varies by tank type and damage severity, but certain categories span nearly every repair job.
Leak Detection and Diagnostic Equipment
Identifying the problem accurately saves hours of guesswork. Ultrasonic testing equipment detects leaks in pressurized systems by sensing the high-frequency sound waves escaping water produces, pinpointing damage locations even when visual inspection fails. Pressure gauges verify system integrity and help diagnose pressure-related failures in both domestic hot water tanks and HVAC buffer tanks. Thermal imaging cameras reveal temperature anomalies that indicate hidden leaks, insulation failures, or thermal stratification issues in thermal storage systems, particularly valuable for diagnosing efficiency losses before they become structural problems.
Repair Materials and Equipment
The repair approach dictates your material list:
- Structural welding equipment (MIG or TIG welders, electrodes, grinders) for steel tank repairs requiring API 653-certified work
- Instant-cure lining systems for interior corrosion and pinhole leaks, offering rapid turnaround on domestic hot water applications
- High-grade epoxy sealants and fiber-reinforced patches for minor leak repairs on concrete, steel, and coated fabric tanks
- Replacement components including valves, fittings, pressure relief valves, and anode rods for water heaters
- Surface preparation tools such as wire brushes, grinders, degreasing agents, and sandpaper to ensure proper bonding
Safety Equipment
Tank repairs involve confined spaces, water damage, and often pressurized or heated systems. Full personal protective equipment, respirators for confined space work, cut-resistant gloves, safety glasses, and steel-toed boots, isn’t optional. Portable ventilation fans prevent dangerous gas buildup when working inside drained tanks. Lockout/tagout equipment prevents accidental system activation mid-repair. For fire protection tanks covered under NFPA 25 standards, you’ll need specialized testing equipment to verify compliance after repairs.
Having professional-grade equipment ready before starting ensures repairs meet safety standards and last.
Critical Safety Warnings Before You Begin
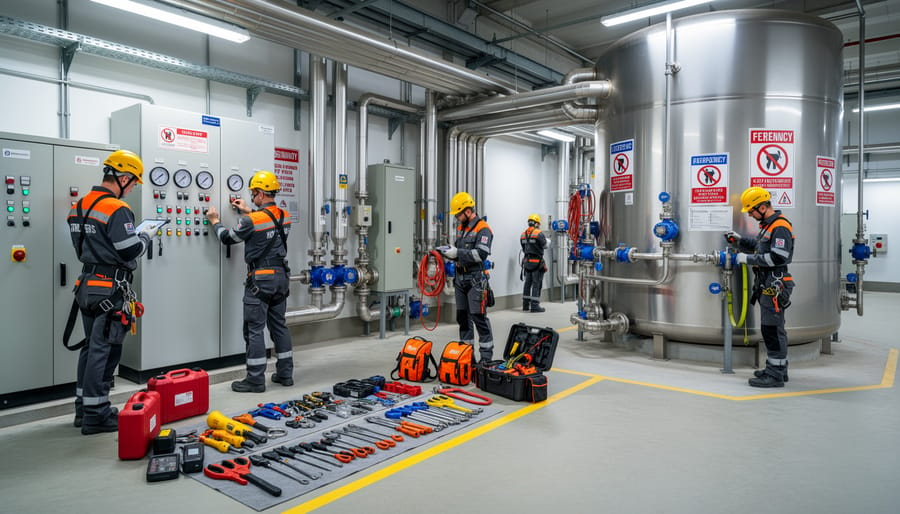
Before attempting any water tank repair, you need to understand that water tanks present multiple serious hazards: electrocution, scalding, confined space asphyxiation, explosive pressure release, and catastrophic structural failure. These risks demand strict safety protocols every time.
Start by shutting off all power to the tank and related equipment at the circuit breaker, not just the switch. Lock out the breaker and tag it to prevent accidental restoration while you work. Next, shut off the water supply using the main valve, then open a faucet downstream to relieve pressure in the system. For hot water tanks, wait several hours for the water to cool below 120°F, scalding injuries happen in seconds with water above 140°F.
Depressurizing is critical for pressure vessels and fire protection tanks. Open relief valves slowly to vent pressure gradually, standing clear of valve discharge points. Never attempt to remove fittings or access panels while the tank remains under pressure.
Ventilation matters enormously when working on tanks in basements, mechanical rooms, or other enclosed spaces. Open doors and windows, run fans to circulate fresh air, and never enter a drained tank without proper confined space training and equipment. Residual gases, low oxygen levels, and vapor accumulation create deadly conditions.
For commercial and industrial tanks, API 653 certification standards govern repair work on atmospheric storage tanks. These standards mandate specific inspection protocols, qualified personnel, and documented repair procedures. If your facility operates fire protection tanks under NFPA 25 requirements, only certified professionals should perform repairs to maintain compliance and system integrity.
Step-by-Step Water Tank Repair Process
Step 1: Inspect and Detect the Problem
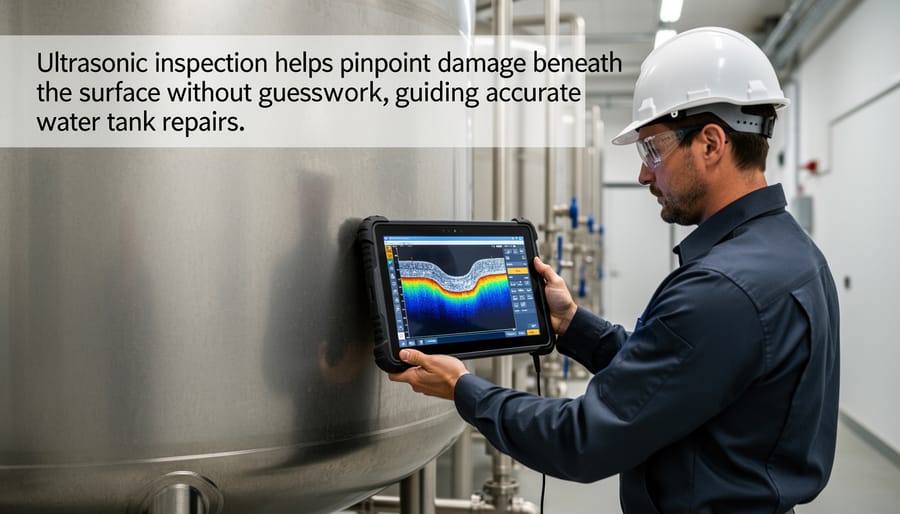
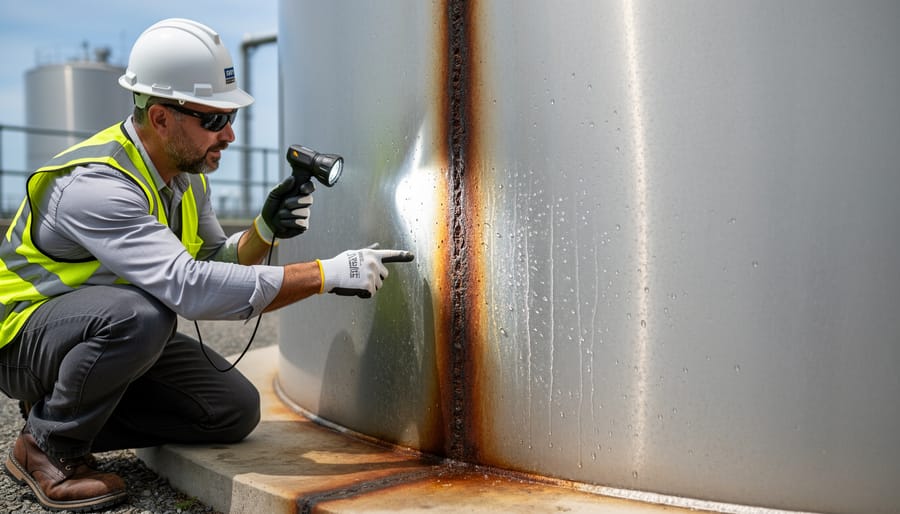
Start by conducting a systematic visual inspection of the entire tank, looking for obvious signs of trouble: water pooling beneath the tank, rust stains, bulging or deformed sections, and moisture on exterior surfaces. Check all connection points, seams, and welds closely, these are common failure spots. For hot water systems, feel for temperature variations on the tank surface, which can indicate internal lining damage.
Professional leak detection often employs ultrasonic testing to pinpoint leaks invisible to the eye, particularly in larger commercial or fire protection tanks. This non-invasive method detects the high-frequency sound of water escaping through small cracks or pinholes. Thermal imaging cameras reveal hot or cold spots that signal internal corrosion or insulation breakdown in domestic hot water and thermal storage systems.
Document everything you find with photos and notes: measure leak severity, note corrosion patterns, and record the tank’s age and maintenance history. This helps you determine the root cause, whether it’s normal wear from age, corrosion accelerated by water chemistry, physical impact damage, or pressure failure from a faulty relief valve. Understanding why the tank failed guides the repair approach and prevents recurrence.
Step 2: Prepare the Tank and Work Area
Before you can repair a water tank, proper preparation is essential for both safety and repair success. Start by shutting off the electrical power at the breaker and closing the water supply valve. For gas-fired systems, turn off the gas supply completely. Next, drain the tank through the drain valve, allowing water to flow into a floor drain or pump it out if necessary, have buckets and a wet vacuum ready for spills.
Once drained, establish proper ventilation if working in a confined space or enclosed mechanical room. Open windows, set up fans, and consider using forced-air ventilation equipment to prevent dangerous fume buildup from cleaning chemicals or repair materials. Create a containment area around the tank using plastic sheeting and absorbent pads to catch any remaining water or debris.
Now prepare the actual repair surface. Remove loose corrosion, scale, and sediment from the damaged area using a wire brush, grinder, or sandpaper. The surface must be completely clean and dry for repair materials to bond properly, any moisture or contamination will cause failure. Wipe down the area with degreaser and let it dry thoroughly. This preparation prevents many of the common pipe issues and tank failures that result from rushed or incomplete surface prep.
With the tank drained, ventilated, and the repair area properly prepared, you’re ready to apply the repair solution.
Step 3: Perform the Repair
With the tank prepped and the damage assessed, you’re ready to execute the repair. The method you choose must match both the severity and location of the damage.
For significant steel tank damage, large cracks, structural failures, or compromised seams, structural welding is the only viable solution. This isn’t DIY territory. A qualified welder certified in pressure vessel work will grind out the damaged section, prepare the edges, and lay down multiple weld passes to restore structural integrity. The weld must penetrate fully and meet code requirements for the tank’s service pressure.
Interior corrosion and pinhole leaks respond well to instant-cure lining systems. These epoxy-based coatings bond directly to prepared metal surfaces, sealing pinholes and creating a protective barrier against further corrosion. Apply according to manufacturer specifications, typically in thin, even layers, and work quickly since cure times start immediately upon mixing. These systems work for both domestic hot water tanks and commercial thermal storage vessels.
Minor exterior leaks often need nothing more than a two-part epoxy patch. Clean the area down to bare metal, mix the epoxy thoroughly, and apply a generous layer extending at least two inches beyond the damaged area. Some patches include reinforcing fabric for added strength.
Component replacement tackles leaks at threaded connections, valves, and fittings. A failing pressure relief valve or corroded drain valve requires complete replacement, not patching. Use thread sealant rated for the tank’s operating temperature and install hand-tight plus one to two turns with a wrench.
Always address the root cause alongside the visible damage. If corrosion caused the leak, consider why, depleted anode rods, aggressive water chemistry, or inadequate ventilation all accelerate tank deterioration.
Step 4: Allow Proper Curing Time
Patience during curing separates lasting repairs from ones that fail within weeks. Most tank sealants and epoxy linings require 24 to 72 hours to reach full strength, depending on temperature and humidity. Check the manufacturer’s technical data sheet, not just the product label, for exact cure times specific to your conditions. Cold weather can double required curing periods, while high humidity may prevent proper bonding altogether.
Refilling a tank before sealants fully cure allows water pressure to push through incompletely bonded repairs, creating new leak paths around the patch edges. The repair might hold initially, then fail catastrophically days later when you’re no longer monitoring it. Professional-grade instant-cure lining systems cure faster but still need verification time before returning to service pressure.
Resist the temptation to speed things up with heat guns or fans unless the manufacturer explicitly recommends it, improper curing conditions void warranties and compromise chemical bonds. For critical systems like fire protection tanks or commercial hot water storage, this waiting period isn’t optional. Plan repairs during low-demand periods when you can afford the downtime, or arrange temporary backup systems rather than rushing a repair that won’t last.
Verification and Testing After Repair
Once the repair materials have fully cured, systematic verification prevents future failures and ensures your tank operates safely. This testing phase separates temporary fixes from lasting solutions, particularly for systems operating under pressure or storing hot water.
Start with a controlled refill. Open the water supply valve slowly while monitoring all repair areas for seepage. Rapid filling can mask small leaks that only reveal themselves under normal operating pressure. For hot water systems, allow the tank to reach full operating temperature before declaring the repair successful, thermal expansion can reopen insufficiently sealed cracks.
Pressure testing provides definitive proof of repair integrity. For domestic water heaters, restore full system pressure and observe the tank for 30 minutes minimum. Fire protection tanks require compliance testing per NFPA 25 standards, which mandate specific inspection intervals and documentation protocols. Commercial installations typically need pressure testing at 1.5 times normal operating pressure, though always follow manufacturer specifications and local codes.
Follow this verification checklist to confirm repair integrity before returning the tank to full service:
- Visually inspect all repair areas under full pressure, using a flashlight to check for moisture or weeping seams
- Check surrounding areas for hidden leaks that may have developed from pressure redistribution after the primary repair
- Test pressure relief valves to ensure they open at the correct PSI and reseat properly without dripping
- Verify thermal efficiency by measuring recovery time and comparing against baseline performance for hot water systems
- Document pressure readings, temperature stability, and visual condition with dated photos for maintenance records
For hot water systems, thermal efficiency verification matters as much as leak prevention. A properly repaired tank should maintain temperature without excessive cycling. If you notice increased energy consumption or longer recovery times after repair, the damage may have compromised insulation or internal components, situations where comparing against the water heater replacement cost becomes necessary.
Schedule a follow-up inspection within 30 days of major repairs. Thermal cycling and pressure fluctuations can reveal weaknesses that weren’t apparent during initial testing. For fire protection systems, NFPA 25 requires quarterly visual inspections and annual internal inspections depending on tank type. Commercial facilities should maintain detailed service logs documenting all repairs, test results, and subsequent performance metrics to satisfy insurance requirements and identify patterns suggesting replacement rather than continued repairs.
Extending Tank Life After Repairs
A successful repair is just the beginning. Proactive maintenance protects your investment and prevents future breakdowns. Implement these practices to maximize water heater longevity and avoid costly emergency repairs down the road.
Establish a regular inspection schedule. For domestic hot water tanks, visual checks every three months catch early warning signs like minor leaks, rust spots, or mineral buildup around fittings. Commercial HVAC buffer tanks and thermal storage systems benefit from quarterly professional inspections that include pressure testing and thermal efficiency verification.
Anode rod replacement is critical for steel water heaters. These sacrificial components corrode instead of your tank, but they wear out. Check them annually and replace when reduced to less than half the original diameter or when the core wire is exposed. Skipping this step cuts tank life in half.
Sediment accumulation reduces efficiency and accelerates corrosion. Drain several gallons from the bottom valve quarterly to flush accumulated minerals. For hard water areas, this simple task can add years to your tank’s service life.
Test pressure relief valves monthly by lifting the lever briefly. A functioning valve releases water then stops when returned to position. If it doesn’t discharge or won’t reseal, replace it immediately. These safety devices prevent catastrophic overpressure failures.
Seattle Hot Plumbing offers comprehensive maintenance plans tailored to your system type, scheduling routine service that keeps tanks running efficiently between repairs. Our technicians also evaluate whether high-efficiency upgrades could reduce operating costs while improving reliability.
Frequently Asked Questions About Water Tank Repairs
How long do water tank repairs typically last?
A properly executed repair on a domestic hot water tank or HVAC buffer tank can last 5-10 years, depending on the repair method, tank condition, and water quality. Structural welding repairs on commercial systems often match the remaining tank lifespan, while epoxy patches and lining systems work best as interim solutions until replacement becomes necessary.
Can I repair a water tank myself?
Minor external leaks on non-pressurized systems might be manageable for experienced DIYers, but most water tank repairs require professional expertise. Any work on pressure vessels, gas-fired systems, fire protection tanks, or structural damage needs licensed technicians to ensure safety and compliance with NFPA standards.
When should I replace instead of repair?
Replace your tank if it’s nearing the end of its expected lifespan (typically 10-15 years for residential water heaters), has multiple leak points, shows extensive corrosion, or if repair costs exceed 50% of replacement cost. Thermal storage systems and commercial tanks often justify repair longer due to their higher replacement costs.
How much do professional water tank repairs cost?
Professional repairs range from a few hundred dollars for minor leaks or valve replacements to several thousand for structural welding or complete interior lining systems. Emergency repairs typically carry premium rates, but addressing issues promptly prevents more expensive failures and potential water damage to your property.
What are signs of imminent tank failure?
Watch for active leaking, pooling water around the base, rust-colored water, loud popping or banging noises, fluctuating water temperature, visible corrosion or bulging on the tank exterior, and sudden drops in hot water capacity. Any of these symptoms warrant immediate professional inspection.
How often should water tanks be inspected?
Residential water heaters benefit from annual inspections, while commercial systems and fire protection tanks require quarterly or semi-annual checks per NFPA 25 standards. HVAC buffer tanks and thermal storage systems should be inspected annually as part of routine system maintenance.
Beyond these common questions, homeowners often wonder about the difference between repairing different tank types. Domestic hot water tanks face different stress factors than thermal storage systems. A standard residential water heater cycles frequently and battles sediment buildup, while HVAC buffer tanks experience less thermal stress but may sit idle for extended periods, allowing corrosion to advance unnoticed.
The repair decision also hinges on your system’s role in your home or business. An HVAC buffer tank supporting a radiant heating system might justify a more expensive repair because the entire heating infrastructure depends on it. Conversely, a standard water heater nearing 12 years old with its first major leak often makes more financial sense to replace with a high-efficiency model.
Fire protection tanks operate under stricter guidelines. These systems must meet NFPA 22 construction standards and undergo regular testing per NFPA 25 requirements. Any repair affecting structural integrity or water storage capacity needs API 653 certified professionals who understand compliance protocols. Cutting corners on fire protection systems isn’t just risky; it can void insurance coverage and violate local fire codes.
For Seattle-area property owners facing urgent tank issues, professional assessment matters more than attempting DIY solutions that might compromise safety or create larger problems. Seattle Hot Plumbing provides 24/7 emergency response for tank failures, whether you’re dealing with a leaking domestic water heater at 2 AM or a failing commercial thermal storage system threatening your building’s heating capacity.
Knowing when to tackle water tank repairs yourself and when to call in professionals can save you significant time, money, and potential safety hazards. Minor issues like sediment buildup or simple valve replacements might be within reach for handy homeowners, but structural damage, pressure vessel work, and fire protection system repairs demand licensed expertise. The consequences of improper repairs, from scalding injuries to catastrophic tank failures, are simply too severe to risk.
Regular maintenance is your best defense against emergency repairs. Schedule annual inspections, monitor for early warning signs like unusual noises or temperature fluctuations, and address small problems before they escalate. For commercial facilities with fire protection tanks, NFPA 25 compliance isn’t optional, it’s essential for safety and insurance coverage.
Seattle Hot Plumbing offers 24/7 emergency service for water tank repairs throughout the Seattle area. Whether you’re dealing with a failing domestic hot water tank at 2 a.m. or need expert assessment of your commercial thermal storage system, our team brings specialized expertise in high-efficiency systems and comprehensive solutions for both residential and business clients. Don’t wait until a small leak becomes a major disaster, contact us today for a professional inspection or immediate emergency repair.